Theme Settings
Overview
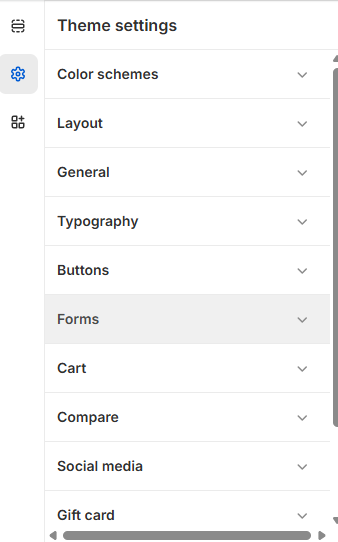
You can use theme settings to make changes to your online store’s typography, colors , social media links, cart , forms , buttons , Inputs , Compare button , Gift card page , and checkout settings. When you make changes to your theme settings, the changes apply to your entire online store.
Color Scheme:
From here, you can select the colors you want to use throughout the theme. You can create multiple unique color schemes and apply them to different sections throughout your online store.
Customize your color scheme:
- From your shopify admin, go to Online Store > Themes
- Click Customize next to the theme that you want to customize.
- Click the settings icon, and then click Color schemes.
- In the Schemes section, click an existing scheme or click Add scheme to add a new color scheme.
- Click the color swatch for the content type color that you want to change.
- To set your color, enter a hex color code or choose the color from the color picker. To set the color to transparent, delete the hex code from the text field.
- Click Save.
Layout:
Customize Layout:
- Click the settings icon, and then click Layout.
- By moving the range slider to choose between a page width of 1200px to 1600px. The default setting is 1410px.
General Settings:
Customize General Settings:
- Click the settings icon, and then click General.
- In the Favicon image area, click Select image, and then do one of the following:
- To use an image that you have already uploaded to your Shopify admin, click an image to select it and then click Select.
- To use an image from your local computer, click Upload. Choose an image from your computer and click Open to start the upload. It will be automatically selected when the upload is finished. Click Select.
- To select a free image, click free images and search for a click an image to select it.
- The recommended size for a Favicon is 32 x 32px.
- Select this checkbox to show/hide the currency code. Cart and checkout prices always show currency codes. Example: $1.00 USD
- .Select this checkbox to Enable/disable the Variant swatches in Product card variants.
- Click Save.
Typography:
From here, you can make font-related customization using different options.
Customize Typography:
- Click the settings icon, and then click Typography.
- For each type of text, click Change to use the font picker.
- Explore available fonts with the search fields or by clicking Load more.
- Click the name of the font you want to use, and then click Select.
- To change the default font size for body, use the Font size scale to select the default font size. The minimum font size is 100% and the maximum font size is 150% . Each increment of the scale increases the font size by 5%. The default setting is 100%.
- Click Save.
Buttons:
You can adjust the borders and thickness of some interactive content types, such as drawers, buttons, variants or quantity inputs.
Customize Buttons:
- From your shopify admin, go to Online Store > Themes
- Click Customize next to the theme that you want to customize.
- Click Theme settings > Buttons.
- By moving the range slider to change the appearance of your button Border.
- By moving the range slider to change the Corner radius of your button.
- Click Save.
Forms:
Inputs are interactive areas that require customer input, for example a quantity selector, an email signup form, or cart notes.
Customize Forms:
- Click Theme settings > Inputs
- By moving the range slider to change the appearance of your input Border.
- By moving the range slider to change the Corner radius of your input.
- Click Save.
Cart:
You can change the style of the cart on your online store. When the customer’s cart is empty, you can display a featured collection on the cart drawer.
Customize Cart:
- From your shopify admin, go to Online Store > Themes
- Click Customize next to the theme that you want to customize.
- Click Theme settings > Cart.
| Setting | Description |
| Cart type | Select this tabs to change the cart type. |
| Enable cart notes | Select this checkbox to show/hide the cart note text field in the cart. |
| Color scheme | A set of colors that you can apply to this section. |
| Enable vendor | Displays the vendors of the products. |
| Enable free shipping message bar |
Select this checkbox to enable/disable the shipping bar on the cart. Note – This feature only works with a shipping method. If you’re using multiple shipping methods, it might show false values to the customers. Refer to Free shipping guide for more information on setting up the free shipping feature in Kidu. |
| Message |
Type any relevant message to notify the users has reached the minimum shipping price. Note – Use ||amount|| to display the amount within the message. |
| Minimum shipping price |
Type any price for providing free shipping to the customers. After reaching this price, the user will be shown a success message. Note – Users must write a number, no letters or special characters. |
| Cart drawer Color Scheme | Choose a predefined color scheme to ensure consistency with the store’s branding. |
| Related product slideshow settings | Customize this section by using the settings on the right side of the theme editor, as described in the following table. |
| Title | Enter any text to appear as the rotating text in the cart drawer. |
| Related collection | Selecting this will show the related products setup from Search and discovery app. |
| Max products to show | Adjust this range bar to select the number of products. |
| Auto-play slides | Select this checkbox to enable/disable the “Auto-play slides” option in the slider. It keeps changing slides automatically on the storefront. |
| Show next/previous arrows |
Select this checkbox to enable/disable the “Show next/previous arrows” option in the slider. Note - Arrows will be visible only on desktop. |
| Change slides every |
This settings will only work when the “Auto-play slides” option is enabled. And, it only provides a range of 2 to 9 seconds. Note - This will only work if auto-play is enabled. |
Compare Button:
Customize Compare:
- Click Theme settings > Compare.
- Select this checkbox to enable/disable the Products comparison.
- Click the Color scheme.
- In the Schemes section, click an existing scheme or click Add scheme to add a new color scheme.
- Click the color swatch for the content type color that you want to change.
- To set your color, enter a hex color code or choose the color from the color picker. To set the color to transparent, delete the hex code from the text field.
- Click Save.
Social media:
Customize Social media:
- Click Theme settings > Social media.
- To add links to your social media accounts, enter the links to your accounts in the fields provided under Accounts. Enter full links, such as https://instragram.com/shopify , https://facebook.com/shopify .
- Click Save.
Gift Card:
Customize Gift:
- Click Theme settings > Gift Card.
- Click the image selector to select the image.
- By moving the range slider to change the width on desktop and mobile screens.
- Click the Color scheme.
- In the Schemes section, click an existing scheme or click Add scheme to add a new color scheme.
- Click the color swatch for the content type color that you want to change.
- To set your color, enter a hex color code or choose the color from the color picker. To set the color to transparent, delete the hex code from the text field.
- Click Save.